


Getting Started with a Motorised Bicycle Kit: What You Need to Know
Aug
If you have ever looked at a regular pushbike and thought it could use a bit more power, a motorised bicycle kit might be exactly what you need. These kits let you add a small engine to an ordinary bicycle so you can still pedal when you want to, but have motor assistance for hills, longer rides or just getting around a bit quicker.
At Blygo we stock a solid range of motorised bicycle kit parts, from complete conversion components through to the smaller bits people need for repairs and upgrades. So, if you’ve been thinking about giving your old faithful bike some much needed horsepower, Blygo has you covered with fast, affordable shipping on all orders.
With all that said, before you pick up your screwdriver and go to town on your bike frame, it’s first important to know what you’re doing. This guide covers the basics: what these kits actually are, how they work, why people like them, and a practical look at fitting one yourself.
What Exactly is a Motorised Bicycle Kit?
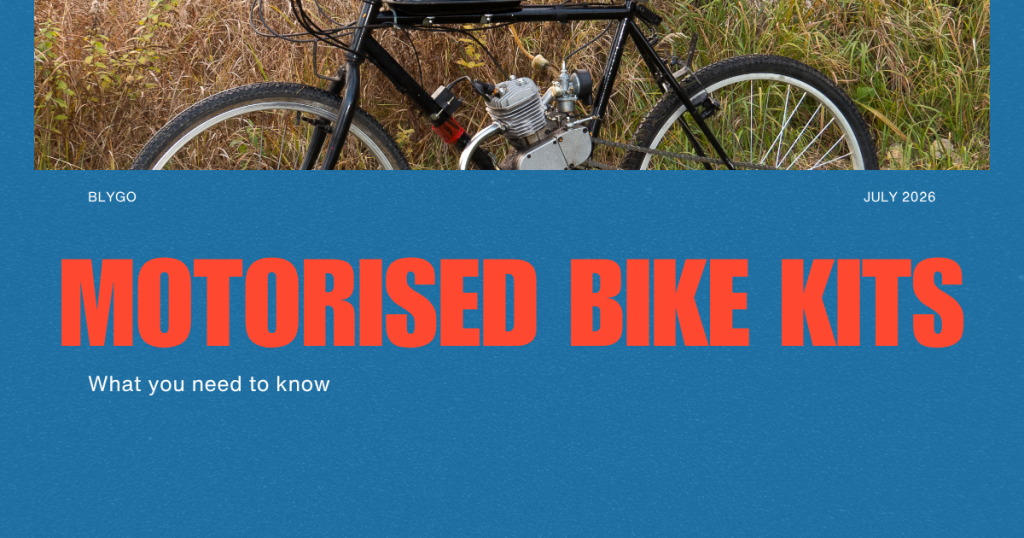
A motorised bicycle kit is a collection of parts built around a small two-stroke petrol engine, usually in the 49cc to 80cc range. The engine mounts inside the frame triangle of a standard bicycle. Alongside the motor you get a carburettor, fuel tank, clutch, throttle, drive chain, rear sprocket, mounting clamps and the various cables and ignition bits needed to make it run.
Once everything is fitted you still have full use of the pedals. The engine simply gives you the option of powered assistance when you want it. Many people use the motor mainly for the harder sections of a ride and pedal the rest of the time. For those that like to go fast, the benefits are pretty obvious, but speed isn’t the only benefit as we’ll go over later.
These kits have been around for years and remain popular because they are relatively simple, affordable and adaptable.
How the Kit Works
The engine drives a chain that connects to a sprocket on the rear wheel. A clutch lever on the handlebar lets you engage or free the engine, while a twist throttle controls how much power you get. Fuel runs from a small tank (often mounted on the top tube) down to the carburettor. A basic CDI ignition system provides the spark.
Starting is usually done by pedalling and then releasing the clutch so the engine fires up. After that you can ride under engine power, pedal power, or a mix of both. It is a straightforward system that most people with basic mechanical skills can understand and look after.
Why People Choose Motorised Bicycle Kits
There are a few clear reasons these kits stay popular.
They’re (Relatively) Cheap
Cost is a big one. Building a motorised bicycle is much cheaper than buying a motorcycle or even many factory electric bikes. You also keep the option to pedal, so the bike does not become completely dependent on the engine.
They’re (Extremely) Practical
They are practical for short trips and local commuting. Hills become less of a problem, and you can cover more ground without arriving soaked in sweat. For some riders the appeal is simply the fun of having a small engine on a light bike.
They’re a Fun Customisable Project
Customisation is another factor. Once the basic kit is on, you can swap carburettors, exhausts, sprockets or chains to suit how you ride. The parts are generally available and not overly complicated.
One important note for Australian riders: rules around petrol-powered bicycles vary by state and territory. Some treat them as motor vehicles that need registration and a licence, while electric pedal-assist bikes have their own set of limits. Always check the current road rules in your area before riding on public roads.
The Main Parts You Will Deal With
Knowing the main parts makes life a lot easier when you are choosing a kit or working on the bike later on.
Engaging the Engine
The engine is really the heart of the whole setup. Most kits use a small air-cooled two-stroke that stays surprisingly light while still putting out decent power for its size.
Mixing Fuel and Air
The carburettor and air filter take care of the fuel and air mix, and keeping the filter clean while having the carb set up properly makes a noticeable difference to how smoothly the bike runs and how much fuel it ends up using.
A secure fuel tank that does not leak is important, and a simple fuel line with a filter is usually enough to keep everything clean and reliable.
Coming in Clutch
The clutch and its lever give you control over when the engine is driving the rear wheel, so getting the cable adjustment right is worth the small effort it takes.
Throttles and Thrills
Throttle grip and cable handle the speed, and a little free play at the grip is normal. That small amount of movement helps everything feel smooth rather than abrupt when you twist it.
Unchained With the Drive Chain
The drive chain and rear sprocket send the power to the wheel. Alignment and tension need regular attention because a chain that is too tight or too loose wears out quickly and can create other problems further down the track.
Going Hard With Mounting Hardware
Mounting hardware is what keeps the engine locked firmly in place. A solid, well-aligned mount reduces vibration and helps the chain run true, which saves a lot of hassle later.
Getting Ready to Ignite
Ignition parts (the CDI, coil and spark plug) provide the spark. They are generally reliable, but they are the first place worth checking if the engine starts becoming hard to fire up.
An Exhausting Experience
An exhaust or muffler finishes the setup, and plenty of people later swap this for something quieter or a bit more lively depending on what they prefer.
Shop With Blygo
Blygo keeps a solid range of these parts in stock, whether you are putting a new kit together or just replacing something that has worn out.
Fitting a Kit Yourself: A Proper Overview
Most kits come with instructions, and following those is the best approach. The general process looks something like this:
Start with a suitable bicycle. Strong steel frames with a clear space in the triangle work best. Avoid frames that already have complicated tubing or brake setups that get in the way.
Unpack everything and check it against the parts list. Lay the components out so you can see what you have.
Mount the engine using the supplied clamps. Take time to get the alignment right so the engine sprocket lines up properly with the rear wheel. Tighten the bolts firmly and plan to recheck them after the first few rides, because vibration can loosen things.
Fit the rear sprocket to the wheel. Some kits use packing pieces that clamp onto the spokes, while others use a more solid adapter. Make sure it is centred and secure.
Connect the drive chain and set the tension. There should be a small amount of movement without the chain being overly tight or loose. Fit the tensioner or idler if one is included.
Mount the fuel tank and run the fuel line to the carburettor. Keep the line clear of moving parts and heat sources.
Install the clutch lever, throttle and kill switch on the handlebars. Route the cables neatly and adjust free play so everything feels smooth.
Do a final check of every bolt, cable and connection. Confirm the chain alignment, that the throttle returns properly, and that the kill switch works. Mix the fuel and oil at the ratio recommended for your engine, especially during the break-in period.
Start the engine according to the kit instructions and take it easy for the first few tanks of fuel. Recheck fasteners regularly during this time.
Basic tools are usually enough: spanners, screwdrivers, pliers and a bit of patience. If something does not feel right, it is better to stop and sort it out than force the issue.
A Few Practical Tips
Use thread locker on important bolts and check them often, especially in the early stages.
Keep the chain clean and correctly tensioned. A neglected chain is one of the most common sources of trouble.
Stick to the recommended fuel-oil mix for two-stroke engines. Running too lean can damage the motor.
If you plan to ride the bike a lot, consider upgrading a few weaker points early, such as a better sprocket mounting system or a quality chain.
Inspect the frame mounts and rear wheel periodically for any signs of stress.
Wear a helmet and ride within your limits and the local rules.
Wrapping Up
A motorised bicycle kit is a practical way to add useful power to an ordinary bicycle without spending a fortune or taking on a complicated project. The systems are straightforward, the parts are available, and with careful installation and basic maintenance most people get reliable results.
If you are looking at building one or keeping an existing setup running, the motorised bicycle kit parts range at Blygo covers the main components you are likely to need. Take your time with the install, look after the bike, and enjoy the extra freedom it gives you on the road or trail.


